
Google Search Console (GSC) is a powerful tool that helps website owners monitor and improve their site’s performance on Google search results. After verifying your website on Google Search Console, you can track organic traffic, fix indexing issues, analyze backlinks, and optimize your site’s visibility.
In this expanded guide, we’ll cover everything from the verification process to advanced tips on how to leverage Google Search Console’s data for long-term success.
Why Use Google Search Console?
Before diving into the steps, it’s important to understand why GSC is crucial for SEO:
- Monitor Search Performance: Track clicks, impressions, click-through rates (CTR), and keyword rankings.
- Fix Indexing Issues: Identify and resolve problems preventing your pages from appearing in search results.
- Improve Backlink Profile: Analyze internal and external links to optimize your site’s link-building strategy.
- Enhance User Experience: Optimize Core Web Vitals and address mobile usability issues.
- Submit Sitemaps: Help Google crawl and index your site efficiently.
- Stay Alert: Receive notifications for security issues, penalties, or major changes affecting your site.
Step 1: Log In to Google Search Console
The first step is logging into your GSC account:
- Visit Google Search Console.
- Use your Google account credentials to log in. Ensure this is the account associated with your website.
- Once logged in, you’ll see options to add and verify your website if you haven’t already done so.
Pro Tip: Use a dedicated Google account for your business to keep access separate from personal accounts.
Step 2: Verify Your Website
Verification is required to prove that you own or manage the website. Here’s how:
1. Choose a Property Type
Google offers two property types:
- Domain Property: Tracks all URLs under your domain, including subdomains and protocols (HTTP/HTTPS).
- URL Prefix Property: Tracks URLs under a specific prefix, such as
https://www.example.com/blog/.
For comprehensive tracking, choose Domain Property.
2. Select a Verification Method
Google provides multiple verification methods. Choose the one that works best for your website setup:
A. DNS Verification (Recommended)
- Copy the TXT record provided by GSC.
- Log in to your domain registrar (e.g., GoDaddy, Namecheap, or Cloudflare).
- Add the TXT record under the DNS settings of your domain.
- Return to GSC and click Verify.
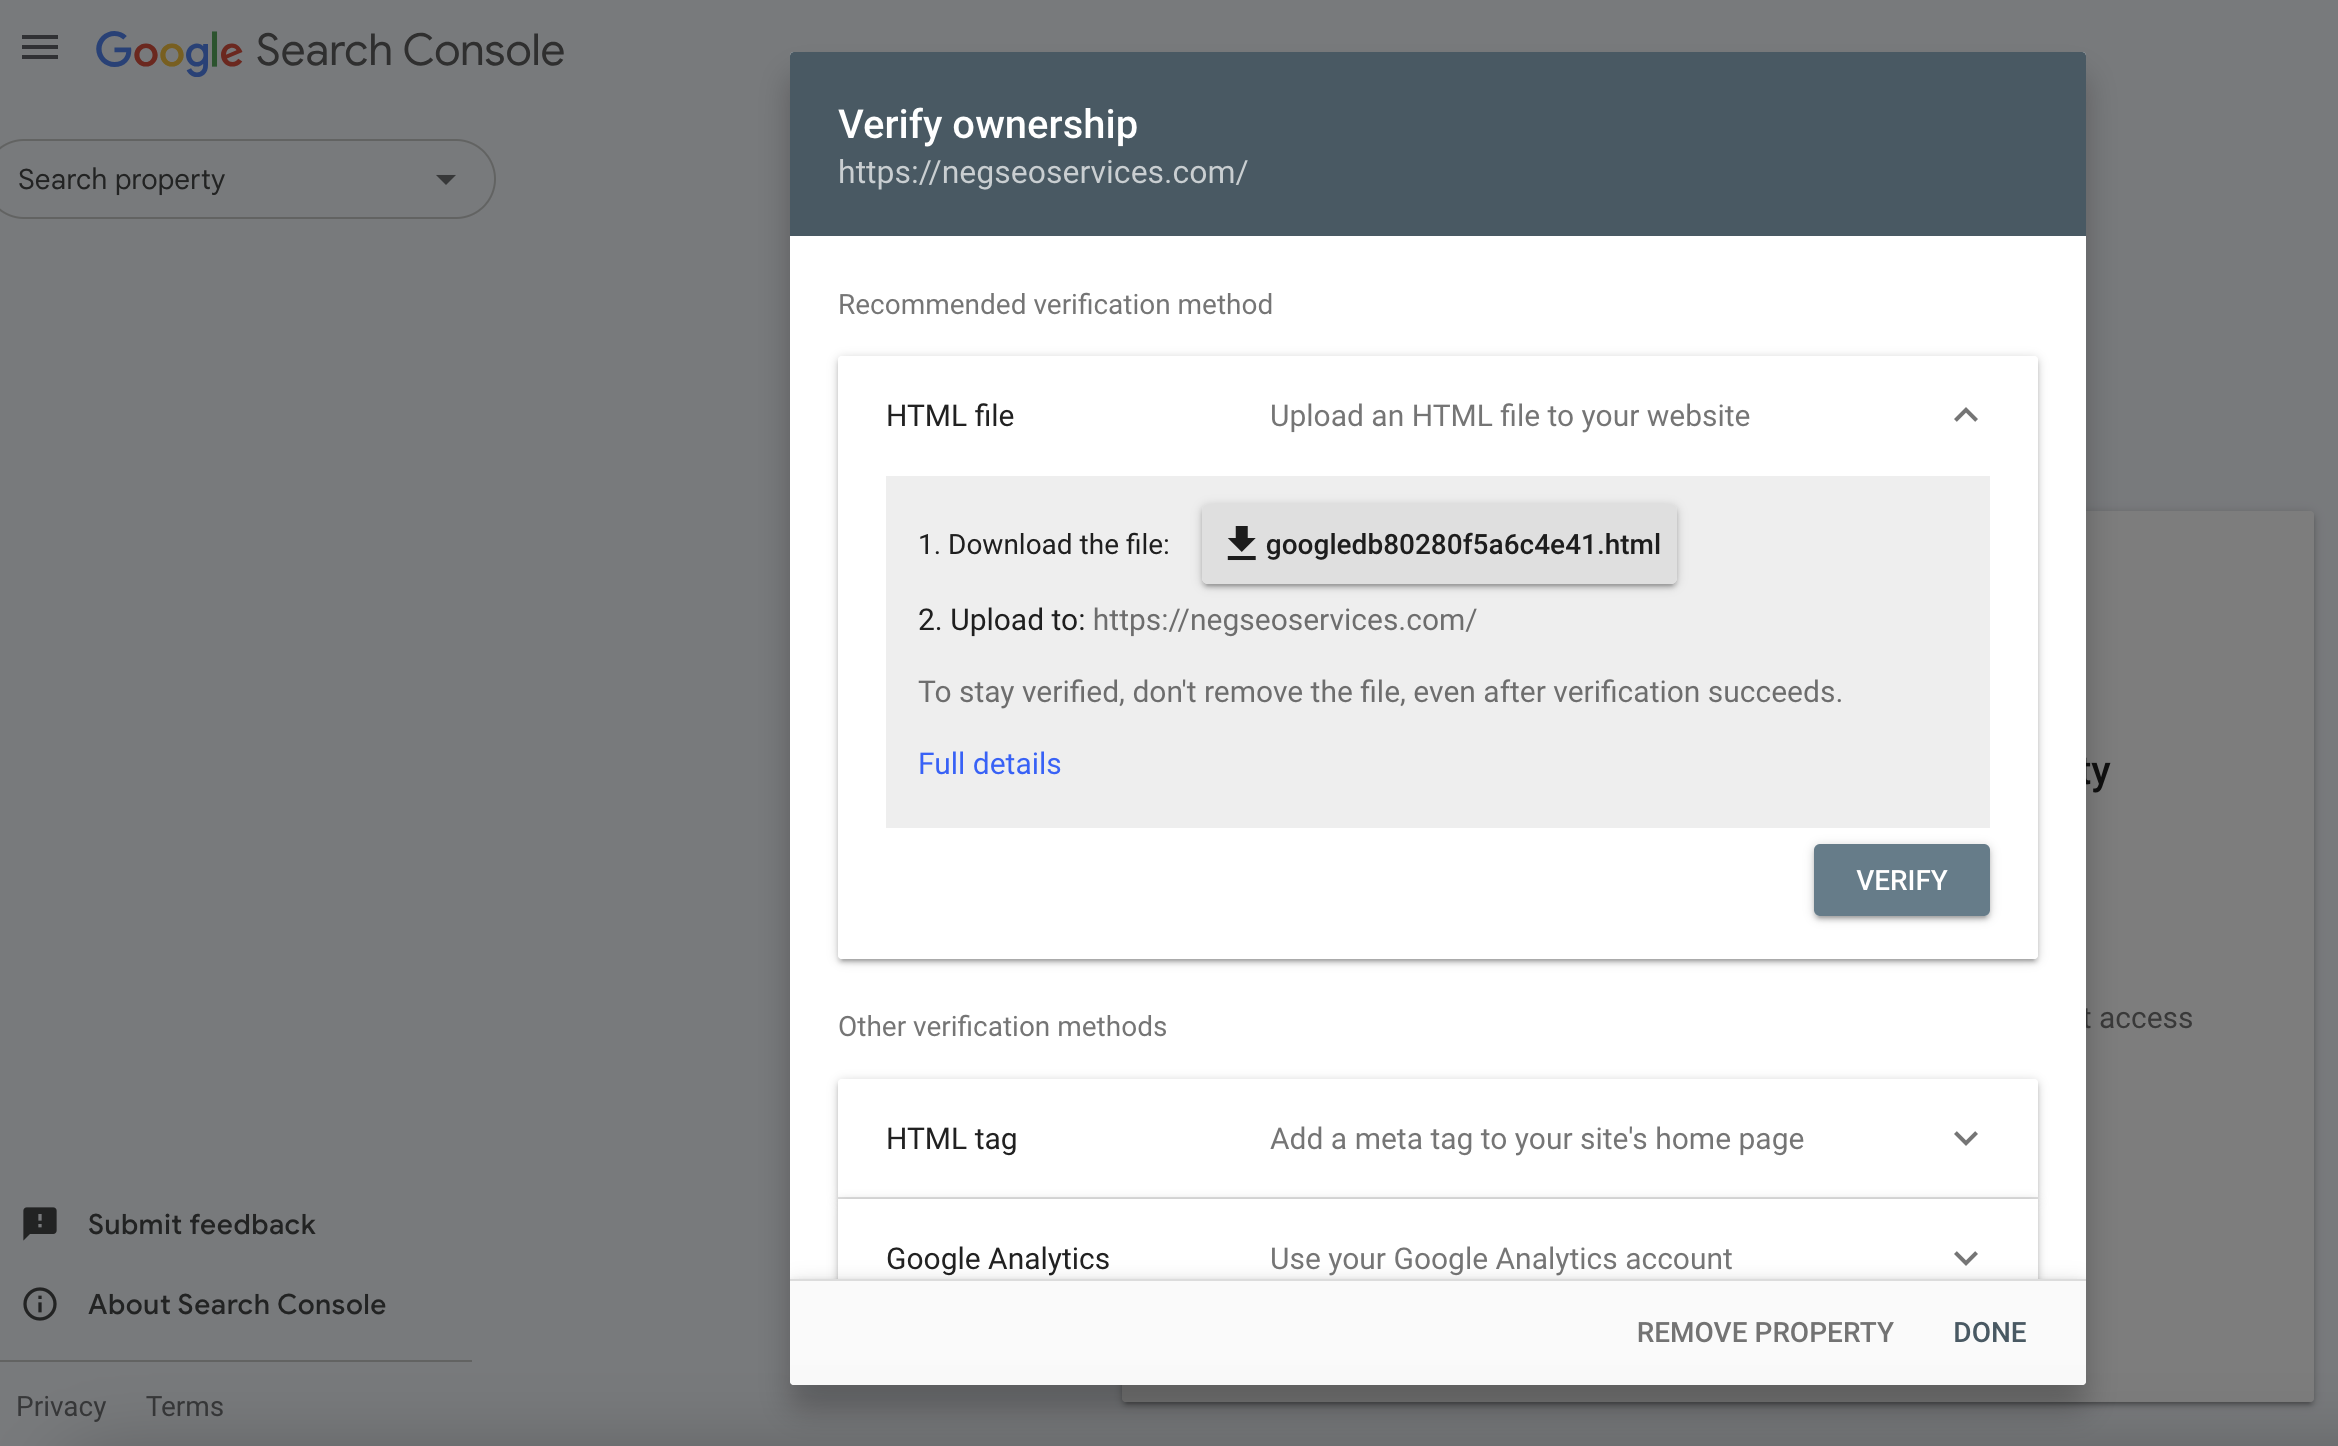
B. HTML File Upload
- Download the HTML file provided by GSC.
- Upload the file to your website’s root directory using FTP or your hosting platform.
- Click Verify in GSC.
C. HTML Meta Tag
- Copy the meta tag code provided by GSC.
- Paste it into the
<head>section of your website’s homepage. - Click Verify.
D. Google Analytics/Google Tag Manager
- Use an existing Google Analytics or Google Tag Manager account linked to your site.
- Grant GSC access to the account.
- Click Verify.
Pro Tip: DNS verification is the most reliable method, especially for tracking multiple subdomains and protocols.
Step 3: Confirm Verification
Once verified, you’ll gain access to your GSC dashboard. If verification fails:
- Double-check that the verification code or file was added correctly.
- Clear your browser cache and retry.
- Contact your hosting provider for assistance with DNS changes.
Example Screenshot: Show the verification success message in GSC.
Step 3: Explore the Google Search Console Dashboard
After verification, familiarize yourself with the GSC dashboard. Key sections include:
A. Performance
- Analyze total clicks, impressions, CTR, and average position for your site in search results.
- Filter data by date range, device type, or search type (web, image, video).
B. Indexing
- Pages: Check how many pages are indexed and identify errors.
- Sitemaps: Submit your sitemap for better indexing.
C. Experience
- Core Web Vitals: Evaluate page load speeds, interactivity, and visual stability.
- Mobile Usability: Identify and fix issues affecting mobile users.
D. Links
- View internal and external backlinks, along with anchor text data.
Example Screenshot: Highlight key sections of the GSC dashboard.
Step 4: Submit Your Sitemap
A sitemap is a file that lists all the pages on your website, helping search engines crawl and index your content efficiently.
- Navigate to Indexing > Sitemaps.
- Enter your sitemap URL, usually
https://yourwebsite.com/sitemap.xml. - Click Submit and wait for Google to process it.
Pro Tip: Use tools like Yoast SEO or Rank Math to generate sitemaps automatically if you use WordPress.
Step 5: Monitor Coverage and Indexing
The Coverage report shows which pages are indexed, excluded, or have errors.
Common Issues:
- 404 Errors: Broken links or missing pages.
- Redirect Issues: Incorrect or infinite redirects.
- Excluded Pages: Pages blocked by
robots.txtor marked as “noindex.”
How to Fix:
- Resolve the issue (e.g., fix broken links or update redirects).
- Click Validate Fix in GSC to notify Google.
Example Screenshot: Display coverage errors and how to validate fixes.
Step 6: Analyze Search Performance
- Navigate to Performance.
- Review metrics like:
- Total Clicks: How many users clicked your site in search results.
- Impressions: Times your site appeared in search results.
- CTR: Percentage of impressions that resulted in clicks.
- Average Position: Your ranking for specific keywords.
Use Filters:
- Queries: Identify keywords driving traffic to your site.
- Pages: Analyze the performance of individual pages.
- Devices: Compare desktop, mobile, and tablet performance.
Pro Tip: Focus on improving CTR for pages with high impressions but low clicks.
Step 7: Optimize Core Web Vitals
Google prioritizes user experience. Use the Core Web Vitals report to identify issues with:
- Largest Contentful Paint (LCP): How quickly the main content loads.
- First Input Delay (FID): How fast the site becomes interactive.
- Cumulative Layout Shift (CLS): Visual stability during page load.
Fixing Core Web Vitals:
- Use a Content Delivery Network (CDN) to improve load speed.
- Compress images using tools like TinyPNG.
- Minimize JavaScript and CSS.
Example Screenshot: Display Core Web Vitals metrics with actionable insights.
Step 8: Review Backlinks
- Navigate to Links.
- Analyze:
- Top Linking Sites: External domains linking to your site.
- Top Linked Pages: Pages on your site receiving the most backlinks.
- Anchor Text: Phrases used in external links.
Actions:
- Focus on acquiring more backlinks to high-priority pages.
- Disavow toxic backlinks using the Google Disavow Tool.
Pro Tip: Use GSC data with tools like Ahrefs or SEMrush for advanced backlink analysis.
Step 9: Submit URLs for Inspection
For newly published or updated pages, use the URL Inspection Tool to:
- Check if the page is indexed.
- Request indexing if the page is not yet crawled.
Pro Tip: Use this tool after significant updates to ensure faster reindexing.
Step 10: Set Up Alerts and Reports
Stay proactive by enabling email notifications for:
- Indexing errors.
- Manual penalties.
- Significant performance changes.
- Go to Settings > Preferences.
- Turn on email alerts for critical updates.
Example Screenshot: Show email alert settings in GSC.
Step 11: Use Advanced Features
1. Enhance Structured Data
Use the Enhancements section to monitor your structured data, such as FAQ or review schema, for errors.
2. Track International SEO
If your site targets multiple countries, review the International Targeting section to ensure correct hreflang tags.
3. Security Issues
Regularly check for security problems like hacked pages or malware.
Conclusion
Google Search Console is a powerful tool that goes beyond verification. By submitting your sitemap, monitoring coverage, optimizing Core Web Vitals, and analyzing backlinks, you can significantly enhance your SEO performance.
For more advanced SEO strategies and services, contact us. Regular use of GSC ensures you stay informed, proactive, and ahead of potential issues that could impact your website’s rankings.
Pro Tip: Schedule weekly or monthly audits in GSC to track your site’s progress and address issues promptly.